Chest exercises are designed to target and strengthen the muscles in your chest through a mix of weighted and bodyweight movements. Enhancing aesthetics, improving posture, and boosting strength are compelling reasons to prioritise chest training. For those with access to gym equipment like cable pulley machines, exercises such as cable crossovers or pec decks can be beneficial. However, if gym equipment is unavailable, it is possible to do many of the chest workouts at home. A home chest workout is not only convenient but also highly efficient since we can target muscle groups we don’t tend to focus on in workouts specific to the gym.
Your chest comprises several muscle groups, including the pectorals (pecs), deltoids (delts), and serratus anterior. The pecs, situated in the upper chest, consist of the pectoralis major and pectoralis minor. The delts are found atop the shoulders and connect to the chest, while the serratus anterior lies along the inner chest wall. Optimal chest exercises aim to engage all these muscle groups to enhance upper-body strength. A flabby and underdeveloped chest can detract from overall body aesthetics.Both men and women can benefit from strengthening their pecs. With an increasing number of women recognising the advantages of weightlifting, toning the chest muscles serves as an excellent starting point for achieving a firm and desirable physique. For many individuals, having a firm and toned body is a primary fitness goal.
The muscles in your chest, triceps, and shoulders are commonly referred to as the 'pushing' muscles of the upper body among trainers. Integrating workouts that target these muscles together, while alternating with exercises for the 'pulling' muscles of the back and biceps, helps create a well-rounded workout routine. It ensures that each muscle group receives adequate attention while allowing for optimal recovery time as you shift focus to other areas. And of course, it's essential to not neglect leg workouts to maintain overall balance and strength and concentrate only on chest exercise.
The Benefits of Training Your Chest Muscles
Given the considerable size of the chest muscles, it's not possible to overlook their significance. Apart from the aesthetic appeal, a well-built chest influences how clothing fits and enhances your appearance. Additionally, chest exercise contributes to better posture, particularly when balanced with back training. Moreover, building chest strength translates into increased power for activities involving pushing or swinging motions with your arms.
How to Train Your Chest Muscles
Engage your scapula by retracting them, and pulling your shoulder blades down and back. This action fully activates your chest muscles during pushing movements.
Pair chest exercises with lower-body pulling exercises. Adopt a full-body strength training approach, balancing lower-body push exercises like squats and lunges with upper-body pull exercises such as rows and lower-body pull exercises like deadlifts and bridges with upper-body push exercises. Upper-body push exercises involve pushing away from the body.
- Whether you're in a gym or at home, having a spotter nearby while lifting heavy weights can prevent potential injuries by assisting if needed.
- Modify chest exercises for home workouts using readily available equipment. If you lack access to a gym or specific equipment, you can still perform effective chest exercises using common household items like dumbbells or resistance bands.
- Emphasise breathing techniques to enhance control and power during exercises. Concentrating on steady breathing patterns enables smoother movement execution and can amplify lifting capabilities. For instance, synchronise inhaling through the nose while bending elbows and exhaling through the mouth while extending arms during a push-up.
- Prioritise correct form to maximise workout benefits and minimise injury risks. Adhering to proper form during chest exercises ensures engagement of upper and lower chest muscles, along with the upper back and arms, for comprehensive results.
Mistakes To Avoid
Adhering to correct exercise techniques is crucial for both safety and efficacy. However, it may be necessary to tailor each chest exercise to suit your specific requirements. Opt for a weight that enables you to maintain complete control of your body throughout the movement. During exercise, closely monitor your body and discontinue immediately if you experience any discomfort or pain.
To ensure continual progress and enhance body strength, integrate appropriate warm-up routines, rest periods, and nutritional practices into your exercise plan. Your progress ultimately hinges on your ability to sufficiently recuperate from your workouts. Allow for a rest period of 24 to 48 hours before targeting the same muscle groups again to facilitate adequate recovery.
25 Best Chest Workouts
1. Incline Pushups

An incline pushup involves elevating your upper body using an exercise box or similar equipment, making it a variation of the traditional pushup.
Incorporating incline pushups into your routine can provide a challenging progression. This position primarily targets your chest muscles while also requiring the activation of your core muscles to maintain proper form and support your back.
- Position yourself facing a bench, table, or the edge of a bed.
- Place your hands on the edge of the bench, slightly wider than shoulder-width apart. Your arms should be straight, but not fully locked at the elbows. Align your feet to maintain a straight line from your arms to your body.
- Bend your elbows slowly to lower your chest towards the edge of the bench while inhaling. Maintain a rigid and straight body throughout the movement.
- Push away from the bench until your elbows are extended, but not locked, while exhaling.
- Continue with slow and controlled repetitions.
2. Decline Pushups

The decline push-up is a bodyweight exercise effective for engaging muscles across your upper and lower body. To perform it, position your hands shoulder-width apart on the floor and elevate your feet onto a raised surface. When executed with correct form, decline push-ups place greater emphasis on your upper pectoral muscles compared to regular push-ups.
- Begin by assuming a push-up position, ensuring your body forms a straight line from head to heel. Place your feet hip to shoulder-width apart, elevated on a bench, and position your hands 1.5 to 2 times shoulder-width apart. Engage your core muscles and tighten your glutes. Press away from the floor to prevent your shoulder blades from protruding.
- Lower your chest and head towards the floor, aiming for a full range of motion until your head is approximately one inch above the floor, or your shoulders reach elbow depth.
- Reverse the movement pattern, pushing back up to the starting position.
- Repeat the exercise, maintaining proper posture throughout. Ensure your shoulders do not elevate or round, and prevent your back from rounding or arching, or your hips from sagging or piking.
3. Cable Crossover/Fly

- Stand up and grasp the handles, one in each hand.
- Take a step forward to slightly extend the weights in the cable machine from the stack.
- Feel the resistance of the cables pulling against your hands as they stretch.
- Maintain a straight back throughout the exercise. Place one foot in front of the other with the knee bent to help maintain balance; this is your starting position.
- Pull your hands in an arched motion in front of your body. If the handles are positioned high, pull downward; if they are at shoulder height, pull them in front of your chest, and if they are low, pull them upward.
- Contract your chest muscles as you bring your hands close to touching.
- With control, slowly return your arms to the starting position.
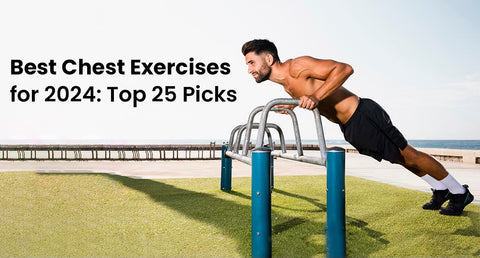
4. Parallel-Bar-Dips

- Position yourself between the parallel bars, gripping each bar with your hands and palms facing downwards.
- Ensure your arms are fully extended and your feet are off the ground.
- Lean forward slightly, maintaining a proud chest, shoulders pulled down and back (shoulder blades retracted), and keep your elbows close to your body.
- Lower your body gradually by bending your elbows and leaning forward until you sense a stretch in your chest, aiming for approximately a 90-degree angle with your arms.
- Exhale as you push yourself back up to the starting position by straightening your arms.
- Repeat the movement for your desired number of repetitions.
5. Decline Dumbbell/Barbell Bench Press

- Begin by picking up the dumbbells from the floor using a neutral grip (palms facing inward). Position the ends of the dumbbells in the crease of your hips, and then sit down on the edge of a decline bench.
- To establish the correct position, lie back on the bench while keeping the weights close to your chest. Once you're properly set, take a deep breath and press the dumbbells upward until your arms are fully extended.
- Lower the dumbbells under control until they reach a comfortable depth (aim for the handles to be approximately level with your chest).
- Engage your chest muscles and push the dumbbells back up to the starting position.
- Repeat this movement for your desired number of repetitions for the dumbbell bench press.
6. Pec Deck

- Before beginning, adjust the seat height so that the bottom of the arm pads aligns approximately with your chest when seated on the machine.
- Choose the desired weight from the stack.
- Sit on the machine and grip the handles or position your forearms on the padding. Slightly lift the weight off the stack. This marks the starting position for the exercise.
- Maintain a stable posture and gradually bring the forearm pads or handles closer together, ensuring they do not touch.
- Contract your chest muscles and hold for a count of 1-3, then slowly return to the starting position.
- Repeat for the desired number of repetitions.
7. Locust

- Begin by bringing your arms down alongside your body, palms facing downwards. Extend your legs straight behind you with the tops of your feet resting on the mat.
- Lower your forehead or chin towards the mat as you prepare. Roll your shoulders back and down, opening up your chest.
- Inhale deeply and lift your head, chest, and arms off the floor, keeping your arms straight and reaching through all ten fingers. Rotate your hands so that your thumbs point downwards, and continue sliding your shoulder blades down your back.
- Engage your leg muscles to lift your knees off the floor, while avoiding excessive tension in your buttocks to allow your tailbone some mobility during the backbend. Press firmly through the tops of your feet into the mat.
- Maintain a neutral gaze on the floor just ahead of you to keep your neck in a comfortable position.
- Remain in this posture for three to five breaths. Exhale as you release back down to the floor. Turn your head to one side and rest on your cheek.
8. Seated Clasp Hand

- This position is an extension of the locust pose, intended to stretch the chest and front deltoids rather than focusing on strength-building. Despite its simplicity, it proves highly effective.
- You can perform this posture while seated or standing. Similar to the locust pose, bring your hands together behind your back, squeezing your shoulder blades and extending your arms.
- Hold this position for 20-30 seconds before repeating.
9. Bench Press

- Lie down on a flat bench and grasp a barbell from the rack above you using an overhand grip that is shoulder-width apart.
- Engage your quads and glutes by pressing your feet firmly into the floor, while also retracting your shoulder blades to reduce the distance the weight needs to travel. This enhances neural activation in your chest, shoulders, and triceps.
- Starting from this position, inhale and gradually lower the barbell until it lightly touches the middle of your chest.
- Concentrate on activating your chest muscles as you explosively push the barbell back to the starting position, exhaling as you do so. This completes one repetition.
10. Incline Dumbbell/Barbell Bench Press:

- Begin by picking up the dumbbells from the floor using a neutral grip (palms facing inwards). Position the ends of the dumbbells in the crease of your hips, then sit down on the edge of an incline bench.
- To get into the proper position, lay back on the bench while keeping the weights close to your chest. Once you're set, take a deep breath and press the dumbbells upward until your arms are fully extended.
- Lower the dumbbells under control until they are comfortably close to your chest (aim for the handles to be roughly level with your chest).
- Contract your chest muscles and push the dumbbells back up to the starting position.
- Repeat this movement for your desired number of repetitions.
11. Bow Pose

- To initiate the bow pose, lie down on your stomach, either on the floor or on a yoga mat. Position your feet apart, approximately the width of your hips.
- Bend your legs upward so that the soles of your feet face toward your head.
- Reach your hands behind you on either side and grasp your ankles. Your left hand should hold your left ankle, while your right hand should hold your right ankle.
- Inhale deeply, lifting your chest off the floor. With the assistance of your hands, raise your legs upward as well. Your body should now form a bow shape, with your chest and knees elevated at the same level.
- Maintain a forward gaze and a gentle smile on your face. Take several deep breaths while holding this position. It may require practice to breathe deeply while maintaining the bow pose but aim for long, full breaths.
- Only bend as far as is comfortable for you, avoiding overstretching. Gauge your limit by bending until you feel balanced and stable in the pose. Continue to breathe deeply throughout.
- After holding the pose for 15 to 20 seconds, exhale and lower your chest and knees to the ground. Release your hands from your ankles and place your arms and legs back on the floor.
12. Wheel Pose

- Lie on your yoga mat with your back against the floor and your knees bent, ensuring your feet are hip-distance apart and positioned under your knees.
- Place your hands beside your ears, palms down, and fingers pointing toward your shoulders.
- Inhale to prepare, then exhale as you lift yourself halfway up, allowing the crown of your head to rest lightly on the mat without bearing weight.
- Keep your elbows and upper arms close together as you begin to arch your middle and upper back.
- On the next inhalation, press firmly into your hands and feet, lifting your body into the pose.
- Maintain a slight bend in your knees and extend your arms as much as possible.
- Ensure your feet are not turned out and press down firmly on your big toes.
- Allow your head to hang freely as you open your chest and lengthen your body.
- To deepen the pose, bring your feet closer to your hands while keeping your forearms and shins parallel to each other and perpendicular to the floor.
- Hold the wheel pose for 5 to 10 breaths.
- To exit the pose, lower directly to the floor without pausing to rest your head on the mat.
13. Sphinx Pose

- Lie on your stomach with your toes resting flat on the floor and your forehead touching the ground.
- Keep your legs together, ensuring that your feet and heels are lightly touching each other.
- Extend your arms forward with palms facing down and keep them in contact with the ground.
- Inhale deeply and gradually lift your head, chest, and abdomen while maintaining contact between your navel and the floor.
- Use your arms to support as you raise your torso off the ground.
- Continue breathing mindfully as you arch your spine, one vertebra at a time.
- Ensure that your feet remain close together and your head is facing straight ahead.
- Exhale gently as you lower your abdomen, chest, and head back down to the floor.
14. Wall Chest Stretch

- Begin by lying on your stomach on your yoga mat, ensuring your pubic bone is pressed towards the ground. Position your elbows directly beneath your shoulder blades.
- Engage your legs by pressing the tops of your feet into the mat and activating your kneecaps and quadriceps.
- Lift your upper body. Inhale deeply as you press firmly into your palms and forearms, lifting your upper body. Create space between your neck and shoulders, extending your heart forward. Maintain a neutral gaze and raise yourself to your comfort level.
- Maintain your breath and posture. Take deep, steady breaths, directing your breath to any areas of tension in your body. Allow your forearms to provide support as you hold the pose for up to one minute. Focus on aligning your body and the quality of your breath rather than pushing the depth of your backbend. After practicing the sphinx pose, transition into the child's pose to counter the backbend.
15. Triangle pose

- To perform the Triangle Pose or Trikonasana, start by standing at the long side of your mat with your feet spaced about a leg's distance apart.
- Rotate your right foot outward so that your toes point towards the short edge of the mat, and turn your left toes inward at approximately a 45-degree angle. Ensure stability through both legs.
- Engage your legs and externally rotate the right thigh so that the right knee aligns with the first two toes.
- Lengthen through both sides of the waist, draw the lower belly in and upward, and lift your arms parallel to the floor.
- Inhale as you extend your body over your right leg, shifting your hips towards the back of the mat. Exhale as you lower your right arm, placing your hand on your leg, the floor, or a block. Rotate your ribs upwards towards the ceiling.
- Extend the left arm straight up towards the ceiling, with the hand in line with your shoulder and the palm facing forward.
- Maintain a lengthened neck, aligning it with your spine. Keep your gaze straight ahead or gently tuck the chin and look up towards your left hand.
- Relax your facial muscles and breathe gently as you press firmly through the feet, extend through the fingertips and crown of the head, and rotate the ribcage.
- To exit the pose, press your feet firmly into the floor, inhale, and reach your left arm up towards the ceiling as you return to standing upright.
- Pivot your heels and repeat the sequence on the other side.
16. Cobra Pose

- Start by lying on your abdomen on the floor or yoga mat, with your forehead and the tops of your feet resting on the ground.
- Ensure your feet are close enough together for your heels to touch, but not wider than hip-width apart.
- Position your palms flat on the ground, either under or slightly to the sides of your shoulders, whichever feels more comfortable. Your fingers should be pointing forward, and your elbows kept close to your sides.
- Inhale and gently push up, straightening your elbows to lift your upper body off the ground. Keep your belly button and pelvis pressed against the floor.
- Draw your shoulder blades back and down, relaxing your shoulders away from your ears to open up the chest muscles.
- Maintain a straight neck or turn your head towards the sky, depending on your preference and flexibility level.
- Continue straightening your elbows to raise your chest higher, while keeping your pelvic bone and thighs pressed into the ground.
- Focus on lifting your chest upwards.
- Exhale as you release the pose, lowering your body back down to the ground.
17. Machine chest press

- Hold the handles with a full grip, ensuring your thumb is wrapped around the handle.
- Keep your wrists in a neutral position aligned with your forearms.
- Exhale as you push outward, extending your arms fully without locking the elbows.
- Maintain a steady head position against the back support, keeping your neck immobile. You should feel resistance as you push horizontally.
- Pause briefly when your arms are fully extended.
- Inhale as you bend your elbows and return to the starting position.
18. Smith Machine Chest Press

- Prepare for the Smith Machine Bench Press by positioning a flat bench under the smith machine and adjusting the weight to your preference.
- Lie back on the bench, ensuring your mid-chest is aligned with the bar.
- Keep your feet planted firmly on the floor to provide stability. Grip the bar with your hands positioned wider than shoulder-width apart.
- Lift the bar from the rack and lower it slowly until it hovers about an inch above your chest.
- Pause briefly, then raise the bar back up without locking your elbows.
- Repeat this motion for your desired number of repetitions.
19. Plate pinch press

- Begin by sitting on the bench while gripping a weighted plate.
- Position one hand on each side of the plate, centred.
- Press your hands together to secure the plate.
- Lie back on the bench, holding the weighted plate straight up toward the ceiling, at chest level.
- Bend your elbows to lower the plate down to your chest, then raise it back up.
- This constitutes one repetition.
20. Resistance band chest fly

- Secure the band behind you at either hip or chest level while standing.
- Position yourself facing away from the anchor point and hold the ends of the band.
- Step back from the anchor point until you feel a gentle tension in the band. You may choose to keep one foot in front of the other for increased stability.
- Raise your arms to shoulder level (or slightly below), ensuring your elbows are slightly bent. Then, pull the band forward and across your body until it meets in front of your chest.
- Hold this position for one second before returning to the starting position.
- Complete 8–10 repetitions to finish one set.
21. Dumbbell Fly

- Begin by picking up the dumbbells from the floor using a neutral grip (palms facing inward). Position the ends of the dumbbells in the crease of your hips, then sit down on the bench.
- As you settle into position, recline and keep the weights close to your chest. Once ready, take a deep breath and press the dumbbells upward until they're fully extended.
- Slightly retract your shoulder blades, unlock your elbows, and gradually lower the dumbbells out to the sides while maintaining a slight bend in your elbows.
- Once the dumbbells reach chest level, reverse the motion by contracting your chest muscles and bringing the dumbbells back to the starting position.
- Ensure the dumbbells don't touch and immediately begin the next repetition. Continue until the set is complete.
22. Low Cable Chest Raise

- Adjust both pulleys to the lowest setting and choose your desired weight.
- Hold both handles with a slightly supinated grip and take a step forward, splitting your stance.
- Press the handles outward until your arms are fully extended, engaging your chest muscles and straightening your elbows.
- Maintain a slight bend in the elbows and focus on moving solely at the shoulder joint. Slowly open your arms while keeping them at a 45-degree angle.
- Return to the starting position by contracting your chest muscles and bringing the handles together at chest height.
- Slowly lower the handles back to the starting position and repeat for the desired number of repetitions.
23. Pullover

- To begin this exercise, sit at the edge of a stable weight bench with your feet placed slightly wider than the bench and firmly planted on the floor. Hold a dumbbell in each hand.
- Slowly roll back onto the bench until your back, neck, and head are fully supported.
- Extend your arms toward the ceiling directly over your chest, with your palms facing each other and elbows slightly bent.
- Inhale deeply as you extend the weights back and over your head while maintaining a strong back and engaged core. Take approximately 3 to 4 seconds to reach a fully extended position where the weights are positioned behind your head, but not below it.
- Exhale slowly as you return your arms to the starting position.
24. Hex Press

- Grab a pair of moderate-to-heavy dumbbells and sit at the edge of a weight bench. Kick off the floor with your feet, rock backward, and lie down on the bench, straightening your arms. Plant your feet firmly.
- Brace your core and extend the dumbbells above your shoulders, palms facing each other, with the sides of the dumbbells touching.
- Maintaining contact between the sides of the dumbbells, lower them toward your abdomen. Press them back up to the starting position, ensuring continuous contact.
25. Floor Chest Press

- Start in an upright sitting position on the floor, legs extended, with the dumbbells standing upright on the floor.
- Grab each dumbbell and position it high in your hip crease, maintaining a firm grip.
- Gradually recline while keeping the dumbbells close to your chest, bending your knees to about 45 degrees and slightly raising your feet.
- Extend the weights fully by contracting your triceps and chest.
- Lower the dumbbells slowly until both elbows touch the floor, then press them back to the starting position.
- Repeat for the desired number of repetitions.
- To finish the exercise, smoothly lower the weights to the ground in a controlled manner, avoiding excessive effort or risking strain on the shoulders.
Conclusion
Focusing on chest exercises is important because it helps strengthen and develop the muscles in your chest area. These muscles, known as the pectorals or pecs, play a key role in various everyday activities such as pushing, lifting, and even pulling. Having strong chest muscles not only improves your physical appearance but also enhances your overall upper body strength and functional abilities. Additionally, chest exercises can help improve posture and balance out muscle development in the upper body. So, incorporating chest exercises into your workout routine can contribute to better overall fitness and health.
Performing the exercises mentioned above can effectively target the chest when done correctly. It's advisable to incorporate these exercises into a comprehensive strength training regimen for a balanced physique.
When attempting these exercises, it's crucial to prioritise proper form and technique. Avoiding rushing through sets and using excessively heavy weights can help prevent injuries. Additionally, it's essential to allow muscles adequate time to recover by avoiding consecutive days of training the same muscle groups.